Learning how to pack a backpack can actually be kind of fun. You might think it’s just about stuffing everything in based on how often you’ll use it—well, sort of. But when you’re carrying 20 to 30 pounds (9 to 13.5 kg) of gear over several days, comfort and balance become essential. That’s where smart packing makes all the difference.
Why It’s Important to Know How to Pack Properly
The more you go backpacking, the better you get at packing. You’ll learn what you really need, what you don’t, and where everything should go.
But if you’re packing your hiking backpack for the first time, just “shoving everything in” won’t cut it.
There are two big reasons to pack thoughtfully:
1. Comfort & Stability
Heavy gear needs to be placed carefully to avoid straining your back and shoulders. If it’s packed wrong, your pack can pull awkwardly, making it less stable and harder to manage—especially on tricky terrain.
2. Convenience
It’s a pain to dig through your entire pack every time you need a map or a snack. Proper packing means you can reach what you need quickly, without sacrificing comfort or balance.
What to Pack—and Where to Put It
What you bring will depend on the season and your destination. If you’ve been on a few overnight hikes, you probably have a system already. But if you’re looking for guidance, here’s a breakdown of what to pack for a 1–2 night trip and where each item should go:
Frequently Used Items
Where to pack them: Top lid, side pockets, or hip belt pockets
Why: Easy access
Examples:
-
Pocket knife
-
Headlamp
-
Map
-
Compass
-
Toilet paper & zip bag
-
Sunscreen
-
Sunglasses
-
Snacks
Keep your daytime essentials in easy-to-reach spots. Ideally, they shouldn’t be in the main compartment—but if they are, pack them near the top.
Lighter Items
Where to pack them: Toward the front or top of the main compartment, away from your back
Why: To balance the load
Examples:
-
First aid kit
-
Toiletries
-
Rain jacket & pants
-
Insulated jacket
Lighter gear goes further from your back to leave room for heavy items closer to your center of gravity.
Heavier Items
Where to pack them: In the middle of the main compartment, close to your back
Why: Better balance and comfort
Examples:
-
Tent
-
Cookware (pot, stove, fuel, bowl)
-
Main food supply
-
Water reservoir
Placing heavy items near your spine helps prevent the pack from pulling you backward and keeps it more stable.
Rarely Used Items
Where to pack them: Bottom of the main compartment
Why: You won’t need them until camp
Examples:
-
Sleeping bag
-
Extra clothing (base layers, warm layers, underwear, socks, towel)
These can be buried at the bottom since you’ll only need them at the end of the day.

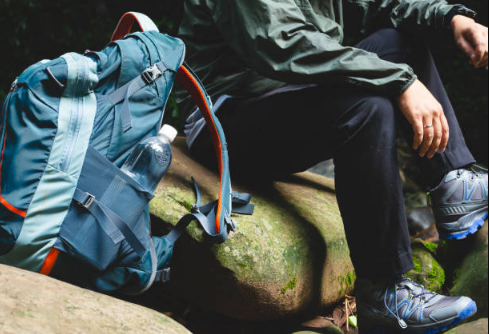
Items That Might Go on the Outside
Where to pack them: Side pockets, gear loops, or strapped to the outside
Why: Either for accessibility or lack of space
Examples:
-
Trekking poles
-
Water bottle
-
Solar charger
-
Ice axe
-
Oversized sleeping pad
More Packing Tips
Now that you’ve got the basics, here are some extra tips to refine your packing system. After a few trips, you’ll develop your own rhythm—but these can help you start off strong.
01. Explore Your Backpack’s Storage Options
Before you start packing, get familiar with your backpack—especially if it’s new. Look for hidden pockets, gear loops, and clever compartments that can make packing more efficient.
02. Lay Everything Out First
Before loading your pack, organize all your gear on the floor or bed. It helps you see what you have and identify anything missing or unnecessary.
03. Use Stuff Sacks
Pack your extra clothes and sleeping bag in waterproof bags. It keeps your pack tidy and protects key items if it rains. A trash bag works in a pinch.
04. Avoid Overpacking
Easier said than done. We all end up with a few things we think we’ll need but never use. If you’re unsure, picture a situation where you might need that item—then imagine surviving that same moment without it. Still necessary?
05. Line Your Pack for Rainy Weather
Add a durable trash bag liner inside your pack for extra waterproofing.
06. Tighten the Compression Straps
After packing, snug up all the outer compression straps. This keeps the load compact and prevents gear from shifting.
07. Don’t Hang Too Much on the Outside
Just because your pack has loops doesn’t mean you should use all of them. Too many dangling items can throw off your balance—and the noise will drive you nuts.
08. Repack if Needed
After you first pack your bag, wear it around. If it feels unbalanced or too heavy in one spot, take the time to adjust. You’ll be glad you did once you’re on the trail.
09. Take Notes Post-Hike
After your trip, unpack slowly and think about what you actually used. Didn’t touch something? Ask yourself why—and whether to bring it next time.
There’s no single “right” way to pack a backpack. But knowing these fundamentals will help you build a system that’s comfortable, efficient, and perfectly tailored to your adventure.
