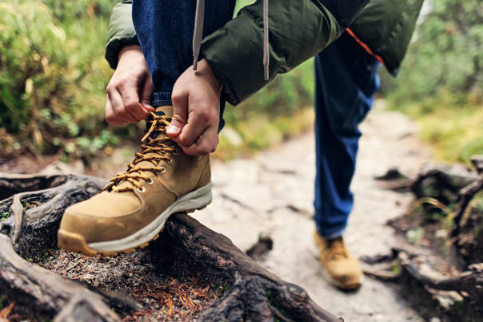
Breaking in hiking boots actually starts before you buy them. Even though most modern brands boast “out-of-the-box comfort,” the truth is: not every pair lives up to the hype.
And more importantly—every foot is different. What feels like a dream to one person might feel like walking on hot coals to another… unless that’s your thing?
How to Wear Hiking Boots the Right Way
From picking the right pair to confidently hitting the trail for miles, here’s how to get the most comfort from your boots—right from the start.
1. Know Your Feet
Before trying anything on, it helps to understand your foot shape. Ask yourself:
-
Are your feet wide or narrow?
-
Do you have high arches?
-
Flat feet?
-
Any bunions?
-
Are your feet different sizes?
-
Have you had boot issues in the past—and what were they?
Knowing your feet makes it way easier to choose the right boots. If you have wide feet or bunions, narrow boots are a no-go from the start.

2. Buy the Right Boots
The most important part of breaking in hiking boots is… buying the right pair to begin with. If you’ve already figured out your foot shape and needs, that’s half the battle.
Take your time with sizing and try on multiple pairs. If you do this part right, you may not need much break-in time at all.
3. Wear Them with Hiking Socks
Try your boots on with the same socks you plan to wear on the trail. Thin cotton socks might feel great in the store, but throw in thick hiking socks and it’s a whole different fit.
Ideally, you shouldn’t have to double up on socks. A good boot should fit snug and comfy with just one solid pair.
4. Walk Around the House
Even if your boots feel amazing right out of the box, don’t head out on a 10-mile hike just yet.
Wear them around the house first—up and down stairs, standing in them for long periods. This gives your feet and boots time to get to know each other. You might confirm they’re perfect… or catch an issue before it ruins your hike.
5. Watch for Any Discomfort
If something feels off after wearing them at home for a few hours, don’t ignore it. You might need to return or exchange them. But first, figure out the cause:
-
Heel rub?
-
Toes feel cramped or tingly?
-
Arch pain or cramping?
-
Pressure on the top of your foot?
-
Hot spots forming?
-
Toes hitting the front when walking downhill?
These are all signs of a poor fit or something that needs tweaking.
6. Take a Short Walk Outside
Once you’ve addressed any minor issues—swapping socks, adjusting laces, or adding insoles—it’s time to head outside.
Don’t go too far just yet. Walk around the block or to a nearby park. That way, you can return quickly if something starts to hurt, and you can make quick adjustments without being miles from home.
Repeat this a few times before heading into the backcountry.
7. Hit the Trail!
You’ve got the lacing dialed in, your socks are on point, and your boots feel great. Time to hike!
Still—just because they feel good doesn’t mean problems can’t pop up on your first real trek. Bring blister supplies and an extra pair of socks. Don’t be afraid to stop and re-lace if something starts to feel off.
Final Thoughts:
Breaking in hiking boots doesn’t have to be painful. In fact, if you take the time to choose the right boots upfront, you might not need to “break them in” at all.
The right fit makes all the difference—and your feet will thank you for it.

